Planning Around Objects
This tutorial will introduce you to inserting objects into the planning scene and planning around them.
Prerequisites
If you haven’t already done so, make sure you’ve completed the steps in Visualizing in RViz.
This project assumes you are starting with the hello_moveit project, where the previous tutorial left off. If you just want to run the tutorial, you can follow the Docker Guide to start a container with the completed tutorial.
Steps
1 Add include for Planning Scene Interface
At the top of your source file, add this to the list of includes:
#include <moveit/planning_scene_interface/planning_scene_interface.hpp>
2 Change the Target Pose
First, update the target pose with the following change to make the robot plan to a different location:
// Set a target Pose with updated values !!!
auto const target_pose = [] {
  geometry_msgs::msg::Pose msg;
  msg.orientation.y = 0.8;
  msg.orientation.w = 0.6;
  msg.position.x = 0.1;
  msg.position.y = 0.4;
  msg.position.z = 0.4;
  return msg;
}();
move_group_interface.setPoseTarget(target_pose);
3 Create a Collision Object
In the next block of code, we create a collision object.
The first thing to notice is that it is being placed in the coordinate frame of the robot.
If we had a perception system that reported the location of obstacles in our scene, then this is the sort of message it would build.
Because this is just an example, we are creating it manually.
One thing to notice at the end of this block of code is that we set the operation on this message to ADD.
This results in the object getting added to the collision scene.
Place this code block between setting the target pose from the previous step and creating a plan.
// Create collision object for the robot to avoid
auto const collision_object = [frame_id =
                                 move_group_interface.getPlanningFrame()] {
  moveit_msgs::msg::CollisionObject collision_object;
  collision_object.header.frame_id = frame_id;
  collision_object.id = "box1";
  shape_msgs::msg::SolidPrimitive primitive;

  // Define the size of the box in meters
  primitive.type = primitive.BOX;
  primitive.dimensions.resize(3);
  primitive.dimensions[primitive.BOX_X] = 0.5;
  primitive.dimensions[primitive.BOX_Y] = 0.1;
  primitive.dimensions[primitive.BOX_Z] = 0.5;

  // Define the pose of the box (relative to the frame_id)
  geometry_msgs::msg::Pose box_pose;
  box_pose.orientation.w = 1.0;  // We can leave out the x, y, and z components of the quaternion since they are initialized to 0
  box_pose.position.x = 0.2;
  box_pose.position.y = 0.2;
  box_pose.position.z = 0.25;

  collision_object.primitives.push_back(primitive);
  collision_object.primitive_poses.push_back(box_pose);
  collision_object.operation = collision_object.ADD;

  return collision_object;
}();
4 Add the Object to the Planning Scene
Finally, we need to add this object to the collision scene.
To do this, we use an object called the PlanningSceneInterface that uses ROS interfaces to communicate changes to the planning scene to MoveGroup.
This code block should directly follow the code block that creates the collision object.
// Add the collision object to the scene
moveit::planning_interface::PlanningSceneInterface planning_scene_interface;
planning_scene_interface.applyCollisionObject(collision_object);
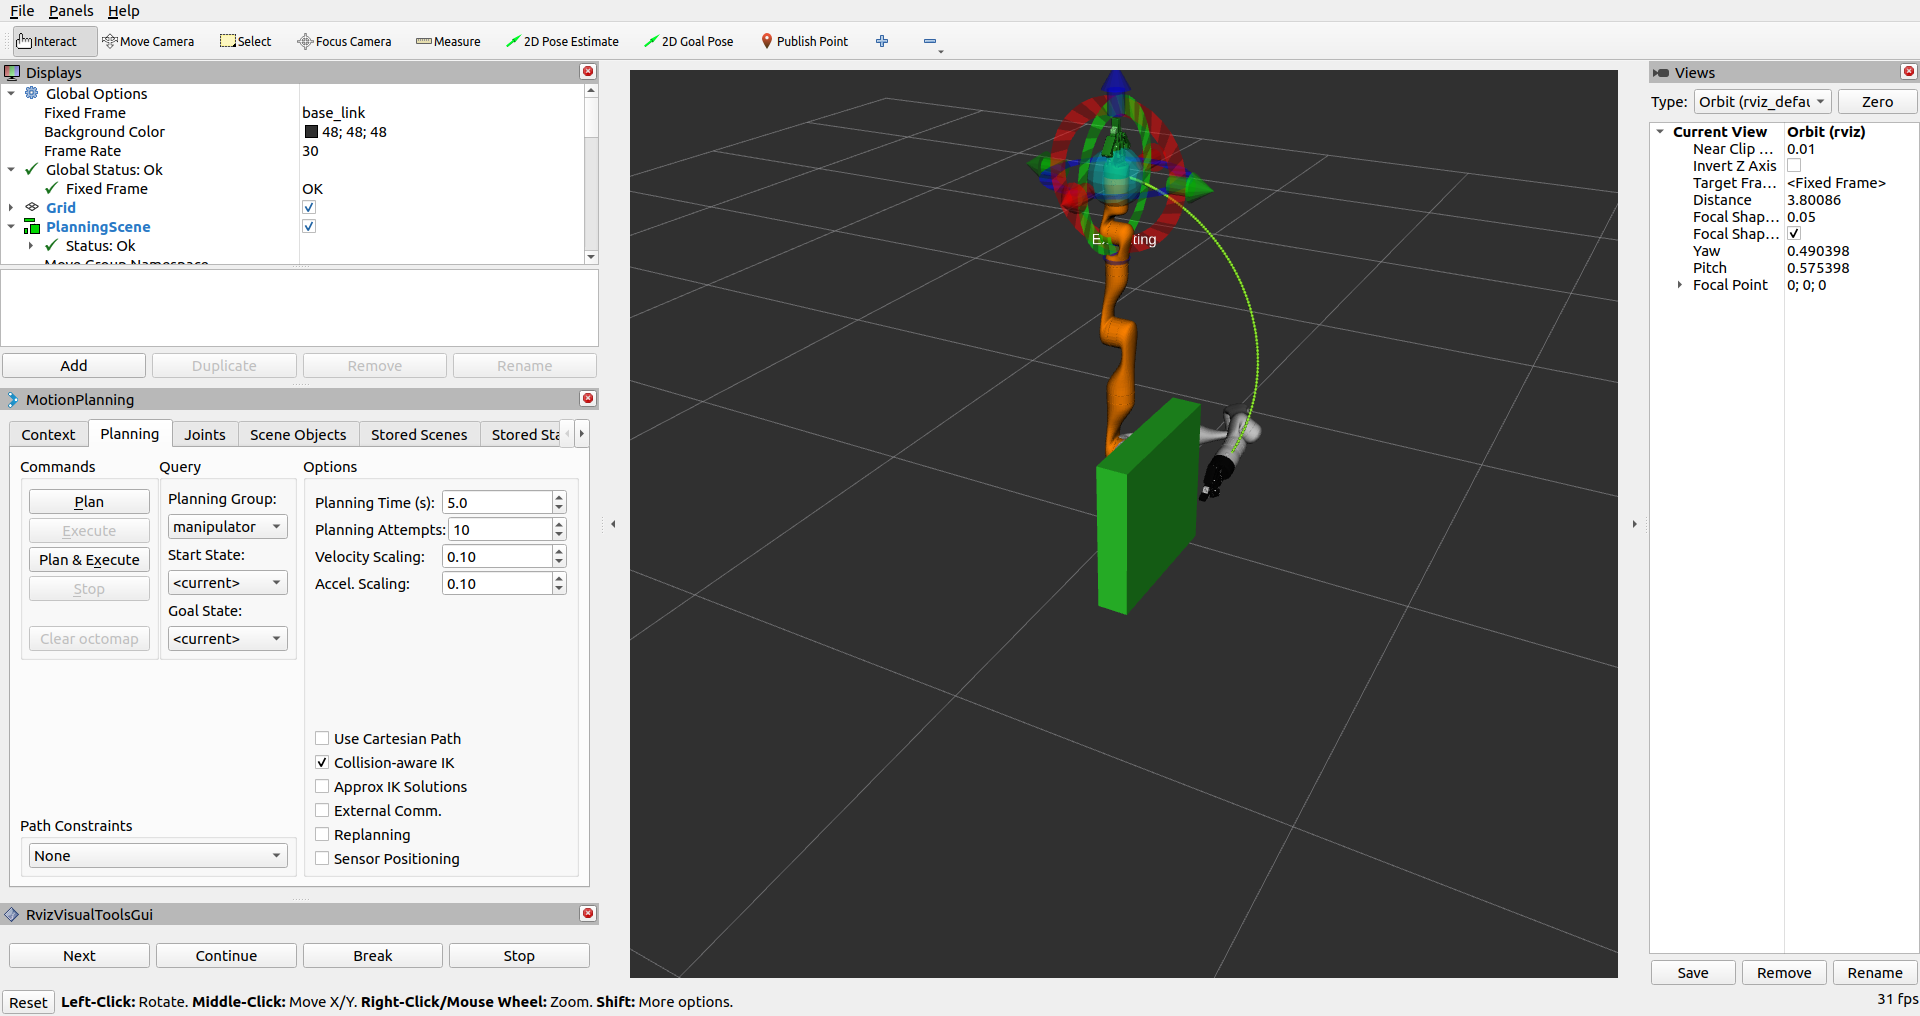
5 Run the Program and Observe the Change
Just as we did in the last tutorial, start RViz using the demo.launch.py script and run our program. If you’re using one of the Docker tutorial containers, you can specify a different RViz configuration that already has the RvizVisualToolsGui panel added using:
ros2 launch moveit2_tutorials demo.launch.py rviz_config:=kinova_hello_moveit.rviz
Summary
You extended the program you wrote with MoveIt to plan around an object in the scene.
Further Reading
Next Step
In the next tutorial Pick and Place with MoveIt Task Constructor, you will be introduced to a higher layer tool designed to solve harder motion plans. In this next tutorial, you will create a program to pick and place an object.